How To Construct an OpenCV Mat Object from C++ Arrays and Vectors
 By
By
Introduction
The Mat class is the workhorse of OpenCV for C++ with around twenty different constructors available providing significant flexibility for building a Mat object to represent image data from a variety of sources. In this How To article I discuss and demonstrate construction of the OpenCV C++ Mat object from array and vector data types.
Constructing an OpenCV Mat Object from C++ Array
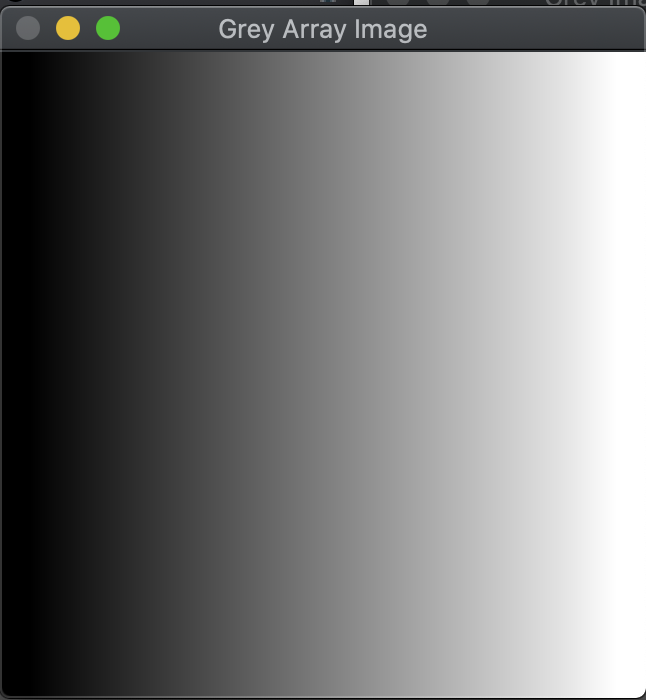
Below is an example of creating a Mat object from a standard C++ two dimensional (ie, nested) array of unsigned 8 bit integers representing grey scale color intensities from black (0) to white (255). In this example I specify the dimensions, in rows and columns, of the Mat object being constructed as well as the data type of CV_8U indicating a single channel 8 bit unsigned integer, also defined as a uchar in OpenCV. I then use the HighGUI library to display the Mat object populated with a gradient of intensities of grey pixels within a named window.
#include <cstring>
#include <iostream>
#include <string.h>
#include <vector>

#include <opencv2/opencv.hpp>
#include <opencv2/highgui.hpp>

using std::cout;
using std::endl;

int main() {

    // Construct from and array
    uint8_t greyArr[11][11] = {
        { 0, 25, 50, 75, 100, 125, 150, 175, 200, 225, 255 },
        { 0, 25, 50, 75, 100, 125, 150, 175, 200, 225, 255 },
        { 0, 25, 50, 75, 100, 125, 150, 175, 200, 225, 255 },
        { 0, 25, 50, 75, 100, 125, 150, 175, 200, 225, 255 },
        { 0, 25, 50, 75, 100, 125, 150, 175, 200, 225, 255 },
        { 0, 25, 50, 75, 100, 125, 150, 175, 200, 225, 255 },
        { 0, 25, 50, 75, 100, 125, 150, 175, 200, 225, 255 },
        { 0, 25, 50, 75, 100, 125, 150, 175, 200, 225, 255 },
        { 0, 25, 50, 75, 100, 125, 150, 175, 200, 225, 255 },
        { 0, 25, 50, 75, 100, 125, 150, 175, 200, 225, 255 },
        { 0, 25, 50, 75, 100, 125, 150, 175, 200, 225, 255 }
    };

    cv::Mat greyImg = cv::Mat(11, 11, CV_8U, &greyArr);
    std::string greyArrWindow = "Grey Array Image";
    cv::namedWindow(greyArrWindow, cv::WINDOW_AUTOSIZE);
    cv::imshow(greyArrWindow, greyImg);

    cv::waitKey(0);
    cv::destroyAllWindows();

    return 0;
}
Here the output image shows grey pixels varying in intensity from black to white when scanning visually from left to right.
Note that only a pointer to the array is passed to the constructor and stored inside the Mat object's data field. This has two important consequences: (i) it is extremely fast because there is no need to allocate memory and populate a new data structure but, (ii) since its just a pointer being shared then any modifications to the original source array is also seen when you query the data using accessor methods of the Mat object or display it graphically.
For example, if I iterate over the source array and set each element to a constant value of say 100 then redisplay the Mat object named greyImg it's evident the greyImg Mat object is pointing to the same data due to it's appearance as a mono-intensity grey image.
#include <cstring>
#include <iostream>
#include <string.h>
#include <vector>

#include <opencv2/opencv.hpp>
#include <opencv2/highgui.hpp>

using std::cout;
using std::endl;

int main() {

// Construct from and array
    uint8_t greyArr[11][11] = {
        { 0, 25, 50, 75, 100, 125, 150, 175, 200, 225, 255 },
        { 0, 25, 50, 75, 100, 125, 150, 175, 200, 225, 255 },
        { 0, 25, 50, 75, 100, 125, 150, 175, 200, 225, 255 },
        { 0, 25, 50, 75, 100, 125, 150, 175, 200, 225, 255 },
        { 0, 25, 50, 75, 100, 125, 150, 175, 200, 225, 255 },
        { 0, 25, 50, 75, 100, 125, 150, 175, 200, 225, 255 },
        { 0, 25, 50, 75, 100, 125, 150, 175, 200, 225, 255 },
        { 0, 25, 50, 75, 100, 125, 150, 175, 200, 225, 255 },
        { 0, 25, 50, 75, 100, 125, 150, 175, 200, 225, 255 },
        { 0, 25, 50, 75, 100, 125, 150, 175, 200, 225, 255 },
        { 0, 25, 50, 75, 100, 125, 150, 175, 200, 225, 255 }
    };

    // ... omitting previous example for brevity

    // modifying the source array is also seen in the greyImg Mat object
    // that was created from it
    for (int i = 0; i < 11; i++) {
        for (int j = 0; j < 11; j++) {
            greyArr[i][j] = 100;
        }
    }
    std::string monoGreyImgWindow = "Mono Grey Arr Image";
    cv::namedWindow(monoGreyImgWindow);
    cv::imshow(monoGreyImgWindow, greyImg);

    cv::waitKey(0);
    cv::destroyAllWindows();

    return 0;
}
As previously stated, the resulting output shows that the modification to the source array data is reflected when using the Mat object that was constructed from it.

Copying Array Data Into an OpenCV Mat Object
If it is desired to actually copy an array's data into an OpenCV Mat object thus giving it it's own separately allocated data to work with you can utilize the memcpy function from the C++ standard library. For example, below I construct a Mat object with 11 rows and columns and of type CV_8U. Next I copy the bytes of the initial C++ array named greyArr into the OpenCV data field. Now I can modify the greyArr elements to be all equal to zero but, this time when I show the created Mat object created from the array's original data the image is seen as the same mono-intensity grey color rather than the zero value representing all black.
#include <algorithm>
#include <cstring>
#include <iostream>
#include <string.h>
#include <vector>

#include <opencv2/opencv.hpp>
#include <opencv2/highgui.hpp>

using std::cout;
using std::endl;

int main() {

    uint8_t greyArr[11][11] = {
        { 0, 25, 50, 75, 100, 125, 150, 175, 200, 225, 255 },
        { 0, 25, 50, 75, 100, 125, 150, 175, 200, 225, 255 },
        { 0, 25, 50, 75, 100, 125, 150, 175, 200, 225, 255 },
        { 0, 25, 50, 75, 100, 125, 150, 175, 200, 225, 255 },
        { 0, 25, 50, 75, 100, 125, 150, 175, 200, 225, 255 },
        { 0, 25, 50, 75, 100, 125, 150, 175, 200, 225, 255 },
        { 0, 25, 50, 75, 100, 125, 150, 175, 200, 225, 255 },
        { 0, 25, 50, 75, 100, 125, 150, 175, 200, 225, 255 },
        { 0, 25, 50, 75, 100, 125, 150, 175, 200, 225, 255 },
        { 0, 25, 50, 75, 100, 125, 150, 175, 200, 225, 255 },
        { 0, 25, 50, 75, 100, 125, 150, 175, 200, 225, 255 }
    };

   // .. omitting previously show examples for brevity

    cv::Mat greyImgForArrCopy = cv::Mat(11, 11, CV_8U);
    std::memcpy(greyImgForArrCopy.data, greyArr, 11 * 11 * sizeof(uint8_t));

    // update every element of greyArr to be black (ie, 0)
    for (int i = 0; i < 11; i++) {
        for (int j = 0; j < 11; j++) {
            greyArr[i][j] = 0;
        }
    }
    std::string copyedArrImg = "Grey Copied Image";
    cv::namedWindow(copyedArrImg);
    cv::imshow(copyedArrImg, greyImgForArrCopy);

    cv::waitKey(0);
    cv::destroyAllWindows();

    return 0;
}
This time is it evident from the output that the data referenced in the Mat object is distinct from the original source array.

Constructing an OpenCV Mat Object from C++ Vector
Pixel data residing in the standard C++ vector can also be used to construct an OpenCV Mat object in a manner very similar to what is shown above in the array example. The major difference being you must call the data() method of the vector class like so.
#include <algorithm>
#include <cstring>
#include <iostream>
#include <string.h>
#include <vector>

#include <opencv2/opencv.hpp>
#include <opencv2/highgui.hpp>

using std::cout;
using std::endl;

int main() {

	// ... omitting the previous examples for brevity

    std::vector<uint8_t> vec = {
        0,   0,   0,   0,   0,   0,
        25,  25,  25,  25,  25,  25,
        50,  50,  50,  50,  50,  50,
        75,  75,  75,  75,  75,  75,
        100, 100, 100, 100, 100, 100,
        125, 125, 125, 125, 125, 125,
        150, 150, 150, 150, 150, 150,
        175, 175, 175, 175, 175, 175,
        200, 200, 200, 200, 200, 200,
        225, 225, 225, 225, 225, 225,
        255, 255, 255, 255, 255, 255
    };
    cv::Mat greyImgFromVec(11, 6, CV_8U, vec.data());
    std::string greyImgFromVecWindow = "Grey Image From Vec";
    cv::namedWindow(greyImgFromVecWindow);
    cv::imshow(greyImgFromVecWindow, greyImgFromVec);

    cv::waitKey(0);
    cv::destroyAllWindows();

    return 0;
}
This time I've varied the pixel intensity so it appears as a gradient from black at the top to white at the bottom.

The previously mentioned behavior of construction via passing a pointer from the source data to the data field of the Mat object holds when constructing using a vector as well. Therefore, any changes made in the vector's data will be seen when using the Mat object also.
Copying vector Data Into an OpenCV Mat Object
Again, the method of copying vector data into a Mat object is done in a similar fashion as seen in the array example utilizing the memcpy function. However, to demonstrate yet another way of constructing a Mat object I will utilize the Size class from OpenCV to specify the dimensions of the Mat object being constructed but, do note the order of dimensions are switched when using the Size object whereby the number of columns is supplied first then followed by the rows which differs from the rows then columns order of the previously shown Mat constructors.
#include <algorithm>
#include <cstring>
#include <iostream>
#include <string.h>
#include <vector>

#include <opencv2/opencv.hpp>
#include <opencv2/highgui.hpp>

using std::cout;
using std::endl;

int main() {
	// ... omitting above examples for brevity

    std::vector<uint8_t> vec = {
        0,   0,   0,   0,   0,   0,
        25,  25,  25,  25,  25,  25,
        50,  50,  50,  50,  50,  50,
        75,  75,  75,  75,  75,  75,
        100, 100, 100, 100, 100, 100,
        125, 125, 125, 125, 125, 125,
        150, 150, 150, 150, 150, 150,
        175, 175, 175, 175, 175, 175,
        200, 200, 200, 200, 200, 200,
        225, 225, 225, 225, 225, 225,
        255, 255, 255, 255, 255, 255
    };
    // ... omitting example for brevity

    // again, the memcpy function can be used to copy a vector's data into
    // a Mat object similar to what was shown with the array example previously.
    cv::Mat greyImgForVecCopy = cv::Mat(cv::Size(6, 11), CV_8U);
    std::memcpy(greyImgForVecCopy.data, vec.data(), vec.size() * sizeof(uint8_t));

    std::fill(std::begin(vec), std::end(vec), 100);

    std::string greyImgFromVecCopyWindow = "Grey Image Vec Copy";
    cv::namedWindow(greyImgFromVecCopyWindow);
    cv::imshow(greyImgFromVecCopyWindow, greyImgForVecCopy);

    cv::waitKey(0);
    cv::destroyAllWindows();

    return 0;
}
Notice that even after filling every element of the vector with the constant value of 100 the Mat object is unphased and still shows the gradient of grey values from black to white.

Resources For Learning More
- Building Computer Vision Projects with OpenCV 4 and C++: Implement complex computer vision algorithms and explore deep learning and face detection is a fantastic project based book to building great things using C++ and OpenCV
thecodinginterface.com earns commision from sales of linked products such as the books above. This enables providing continued free tutorials and content so, thank you for supporting the authors of these resources as well as thecodinginterface.com
Conclusion
In this short How To article I have demonstrated some rudimentary examples of constructing an OpenCV Mat object from C++ array and vector data structures.
For completeness below is the entire main.cpp source file containing all examples from this article.
#include <algorithm>
#include <cstring>
#include <iostream>
#include <string.h>
#include <vector>

#include <opencv2/opencv.hpp>
#include <opencv2/highgui.hpp>

using std::cout;
using std::endl;

int main() {
    // Constructing from an Array
    uint8_t greyArr[11][11] = {
        { 0, 25, 50, 75, 100, 125, 150, 175, 200, 225, 255 },
        { 0, 25, 50, 75, 100, 125, 150, 175, 200, 225, 255 },
        { 0, 25, 50, 75, 100, 125, 150, 175, 200, 225, 255 },
        { 0, 25, 50, 75, 100, 125, 150, 175, 200, 225, 255 },
        { 0, 25, 50, 75, 100, 125, 150, 175, 200, 225, 255 },
        { 0, 25, 50, 75, 100, 125, 150, 175, 200, 225, 255 },
        { 0, 25, 50, 75, 100, 125, 150, 175, 200, 225, 255 },
        { 0, 25, 50, 75, 100, 125, 150, 175, 200, 225, 255 },
        { 0, 25, 50, 75, 100, 125, 150, 175, 200, 225, 255 },
        { 0, 25, 50, 75, 100, 125, 150, 175, 200, 225, 255 },
        { 0, 25, 50, 75, 100, 125, 150, 175, 200, 225, 255 }
    };

    cv::Mat greyImg = cv::Mat(11, 11, CV_8U, &greyArr);
    std::string greyArrWindow = "Grey Array Image";
    cv::namedWindow(greyArrWindow, cv::WINDOW_AUTOSIZE);
    cv::imshow(greyArrWindow, greyImg);

    // note that the above simply copied the pointer into the Mat
    // object thus, its is only operatoring on the original array
    // data which is very fast but, may not be exactly what you want
    for (int i = 0; i < 11; i++) {
        for (int j = 0; j < 11; j++) {
            greyArr[i][j] = 100;
        }
    }
    std::string monoGreyImgWindow = "Mono Grey Arr Image";
    cv::namedWindow(monoGreyImgWindow);
    cv::imshow(monoGreyImgWindow, greyImg);

    // The Mat class also prints to standard out in a nicely readable format
    // (a handy debugging feature for smallish Mat objects)
    cout << "greyImg = \n" << greyImg << endl;

    // Now lets say I want to copy the data from my 2D array into a Mat instance so it
    // has it's own copy to use and manage I can do so with memcpy
    cv::Mat greyImgForArrCopy = cv::Mat(11, 11, CV_8U);
    std::memcpy(greyImgForArrCopy.data, greyArr, 11 * 11 * sizeof(uint8_t));

    // update every element of greyArr to be black (ie, 0)
    for (int i = 0; i < 11; i++) {
        for (int j = 0; j < 11; j++) {
            greyArr[i][j] = 0;
        }
    }
    std::string copyedArrImg = "Grey Copied Image";
    cv::namedWindow(copyedArrImg);
    cv::imshow(copyedArrImg, greyImgForArrCopy);


    // Construct from vector
    std::vector<uint8_t> vec = {
        0,   0,   0,   0,   0,   0,
        25,  25,  25,  25,  25,  25,
        50,  50,  50,  50,  50,  50,
        75,  75,  75,  75,  75,  75,
        100, 100, 100, 100, 100, 100,
        125, 125, 125, 125, 125, 125,
        150, 150, 150, 150, 150, 150,
        175, 175, 175, 175, 175, 175,
        200, 200, 200, 200, 200, 200,
        225, 225, 225, 225, 225, 225,
        255, 255, 255, 255, 255, 255
    };
    cv::Mat greyImgFromVec(11, 6, CV_8U, vec.data());
    std::string greyImgFromVecWindow = "Grey Image From Vec";
    cv::namedWindow(greyImgFromVecWindow);
    cv::imshow(greyImgFromVecWindow, greyImgFromVec);

    // similar to what was shown in the Array section when a Mat object
    // is constructed in this manner a pointer to the vector data is copied
    // to the data field within the Mat object so, modifying the source vector
    // data will be reflected when displaying the contents of the Mat object.

    // again, the memcpy function can be used to copy a vector's data into
    // a Mat object similar to what was shown with the array example previously.

    cv::Mat greyImgForVecCopy = cv::Mat(cv::Size(6, 11), CV_8U);
    std::memcpy(greyImgForVecCopy.data, vec.data(), vec.size() * sizeof(uint8_t));

    std::fill(std::begin(vec), std::end(vec), 100);

    std::string greyImgFromVecCopyWindow = "Grey Image Vec Copy";
    cv::namedWindow(greyImgFromVecCopyWindow);
    cv::imshow(greyImgFromVecCopyWindow, greyImgForVecCopy);

    cv::waitKey(0);
    cv::destroyAllWindows();

    return 0;
}
As always, I thank you for reading and please feel free to ask questions or critique in the comments section below.